Hands-On Wednesday: What Can Beat the Heat?
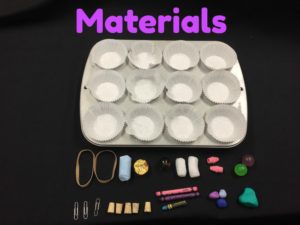
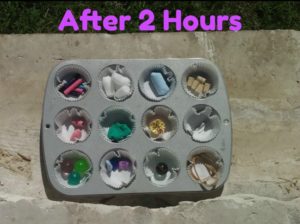
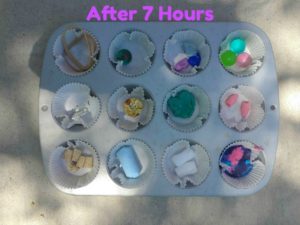
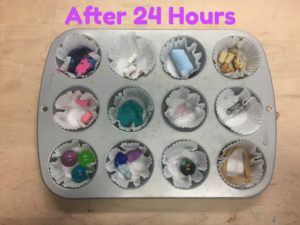
Here in Texas, it is getting quite hot outside, so we chose to see what objects could beat the heat this week! Using a muffin tin, we added various objects we had leftover from Summer Camp to test. We made predictions about which objects would melt in the 90 to 100 degree weather we’re experiencing here, and after 24 hours, we found that the crayons and chocolate had melted completely! We know that every solid has a melting point — but only a few that we chose had melting points low enough that they couldn’t beat the Texas heat. Choose some objects around your house, and try this out at home!
Hands-On Wednesday: Fluffy Slime
Do you love to play with gooey slime? You can create your very own slime with just a few simple ingredients. When you add all of the ingredients, they work together to create a slimy polymer. Polymers are collections of continuously repeating molecules. The glue is a liquid polymer by itself, but when you add the contact solution, it cross links the long strands of glue molecules so when you pull out one chain of slime, all the rest comes with it in a blob!
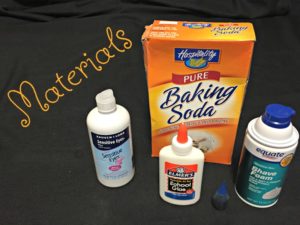
Materials:
- Shaving Cream
- Bottle of Elmer’s Glue
- Food Coloring
- Baking Soda
- Contact Solution
- Large Bowl
How to:
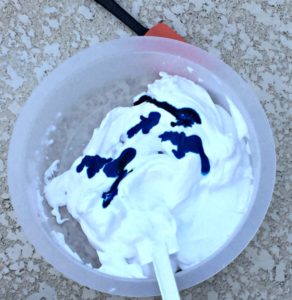
1) Add the following ingredients to a bowl in the order they are listed:
- 3.5 bottles of shaving cream
- 5 4oz bottles of Elmer’s glue
- 30 drops of food coloring of choice
- 5 tsp baking soda
- 10 tbsp contact solution
2) Stir vigorously for 5-10 minutes.
3) Get messy!
This slime has another cool property. It has a lot of viscosity! Viscosity is a fluid’s resistance to flow. Water likes to flow very fast. Think about when you pour out a glass of water — it quickly spills to the ground. This means water has a low amount of viscosity. Not all liquids are in such a hurry to get somewhere! Have you ever put maple syrup on your pancakes? Does maple syrup come out as fast as water? No. So, we say that maple syrup is more viscous than water. Polymers, like this slime, tend to be more viscous. That’s why this slime moves more slowly between your hands as you play with it!
Hands-On Wednesday: Celebrate Shark Week
What do the following items have in common?
- Poisonous sea snakes
- Cans of paint
- License plates
- Two full-sized dolphins
- Nuts and bolts
Stumped? They were all found in the stomach of a SHARK!
Join Girlstart as we celebrate Shark Week with this fun STEM activity!
This summer, Girlstart girls explored animal adaptations and the physical traits that allow sharks to survive; then went even further to design and create their own shark. Learn more about shark characteristics, follow the steps below, and join in on the adventure to make your own shark at home!
Did You Know?
- Sharks can range in size from as small as 2-3 feet up to 40 feet long!
- Unlike fish, whose skeletons are made up of bones, sharks bodies are made up of cartilage, which is much more dense.
- Most sharks are denser than water, so you would think that sharks sink to the bottom of the ocean floor, however, sharks’ oil-filled livers are less dense, which allow them to swim through the different ocean layers.
- Sharks have good eyesight, however, unlike humans, sharks’ eyelids close from the bottom to the top.
- Sharks have an excellent sense of smell and can smell their prey from over a ¼ mile away!
- Even better than a shark’s sense of smell, is their ability to sense vibrations of other animals moving in the surrounding water.
- Hammerhead Sharks have an unusually shaped head. This helps them to maneuver through the ocean like the rudders of submarines.
- The Nurse Shark has barbells that hang below their nose, which helps them smell their bottom-dwelling prey.
- Traveling in large schools helps the small Spiny Dogfish (3-4 feet long) stay safe from larger sharks.
Materials:
- White paper lunch bag
- Newspaper
- Pencil
- Colored pencils or markers
- Scissors
- Tape
How To:
- What adaptations would the ultimate shark have? Brainstorm 3-5 adaptations that you want your shark to have. Will it be difficult for it’s prey to see the shark coming because they are camouflaged against the sand? Sketch your new species of shark and describe how its adaptions help it survive.
- Laying the paper bag flat, draw the profile of your shark filling up a large space of the paper bag.
- Cut the outline of the shark so that you have cut two outlines of the shark (one from each side of the bag).
- Color your shark using colored pencils or markers. Make sure both sides are decorated!
- Staple the two shark outlines together almost completely around the outside, leaving an opening to stuff the shark.
- Stuff the shark with newspaper, tissue paper, or even scraps from the paper bag and staple closed to keep the filling inside.
- Show off your new shark species, share the unique adaptations, and how it helps your shark survive in its environment.


